
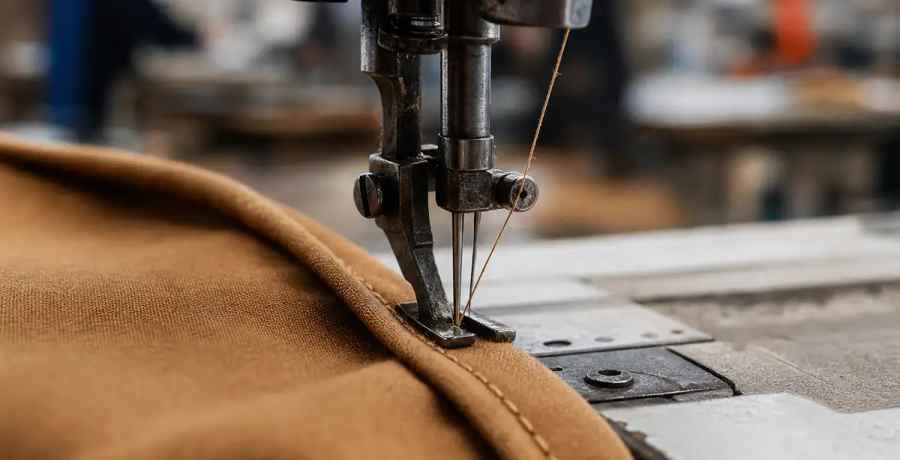
7 construction callouts decide whether a sewer produces your garment the way you intended: stitch class and SPI, seam class, edge finish, topstitch spacing and margin, reinforcement points, closure construction, hem and cuff treatment, and lining attachment. Geometry gives the outline. Callouts tell a human how to build it. AI generators are good at geometry. They are consistently weak at the sentences a factory operator reads before they touch a needle.
A construction callout is an instruction that pairs vocabulary a factory recognizes with a measurable target. Think: 301 lockstitch at 10 to 12 SPI, SSa-1 seam with 1 cm SA, 504 overedge finish then turn 0.5 cm and topstitch 1.5 mm from edge. It is a sentence with numbers that binds design intent to a repeatable method on a specific set of machines.
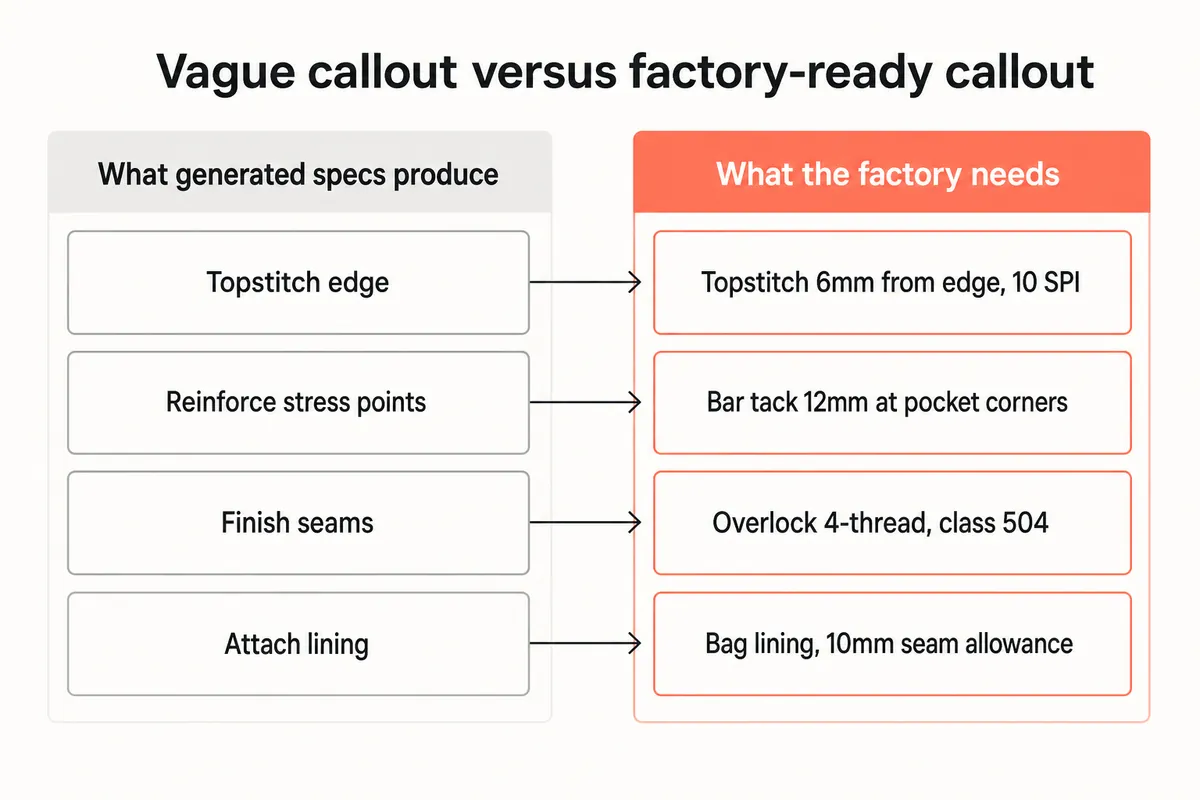
When AI tools guess at this field, they tend to write design prose or drop in a generic phrase. You get lines like stitch as appropriate or overlock edge, which a vendor reads as permission to use house standards. House standards are not your standards. The result is a first sample that looks finished but misses hand feel, seam profile, or durability targets by a visible margin.
The root cause is context. Stitch class selection depends on fabric hand, structural load at that seam, and the cost and speed profile of a vendor's line. Seam class depends on woven versus knit and whether the seam must press open, lie flat, or stretch. Topstitch spacing depends on brand look and needle plate tolerances. Those inputs are rarely present in the design file an AI sees. Without them, the safe output is vague text. Vague text is exactly what a sewer cannot use.
The market has split into two camps that do not solve this problem. One camp generates something and treats that as the finish line: a pattern, a.DXF, a render, a draft tech pack. Tools like CLO, Browzwear, and Optitex are strong at geometry and visualization. Some AI sketch-to-spec demos can now propose stitch names, but they do not validate against your fabric, your vendor's machines, or your standards.
The other camp stores the record. PLM and PIM platforms like Centric and FlexPLM track versions, BOM items, and approvals. They are strong at control and audit, but, by design, they accept whatever arrives.
Neither camp validates. The expensive gap sits between a spec was produced and a factory accepted the spec without a revision round. That is where avoidable cost, delay, and rework live. The F* Word exists in that gap as the validation and orchestration layer. It generates a factory-ready tech pack in 8 to 10 minutes from a garment design, including BOM and construction notes, and it also generates moodboards as the upstream half of the same workflow. It is not a PLM, not a 3D sim, and not an image generator. Its differentiator is the set of checks that run before the spec leaves the building. If you want a deeper view of why geometry alone is not a handoff, read Why Pattern Intelligence Is Not a Tech Pack and Why.DXF Files Are Not a Factory Handoff.
Comparison: construction callouts, vague forms, and what happens in sample
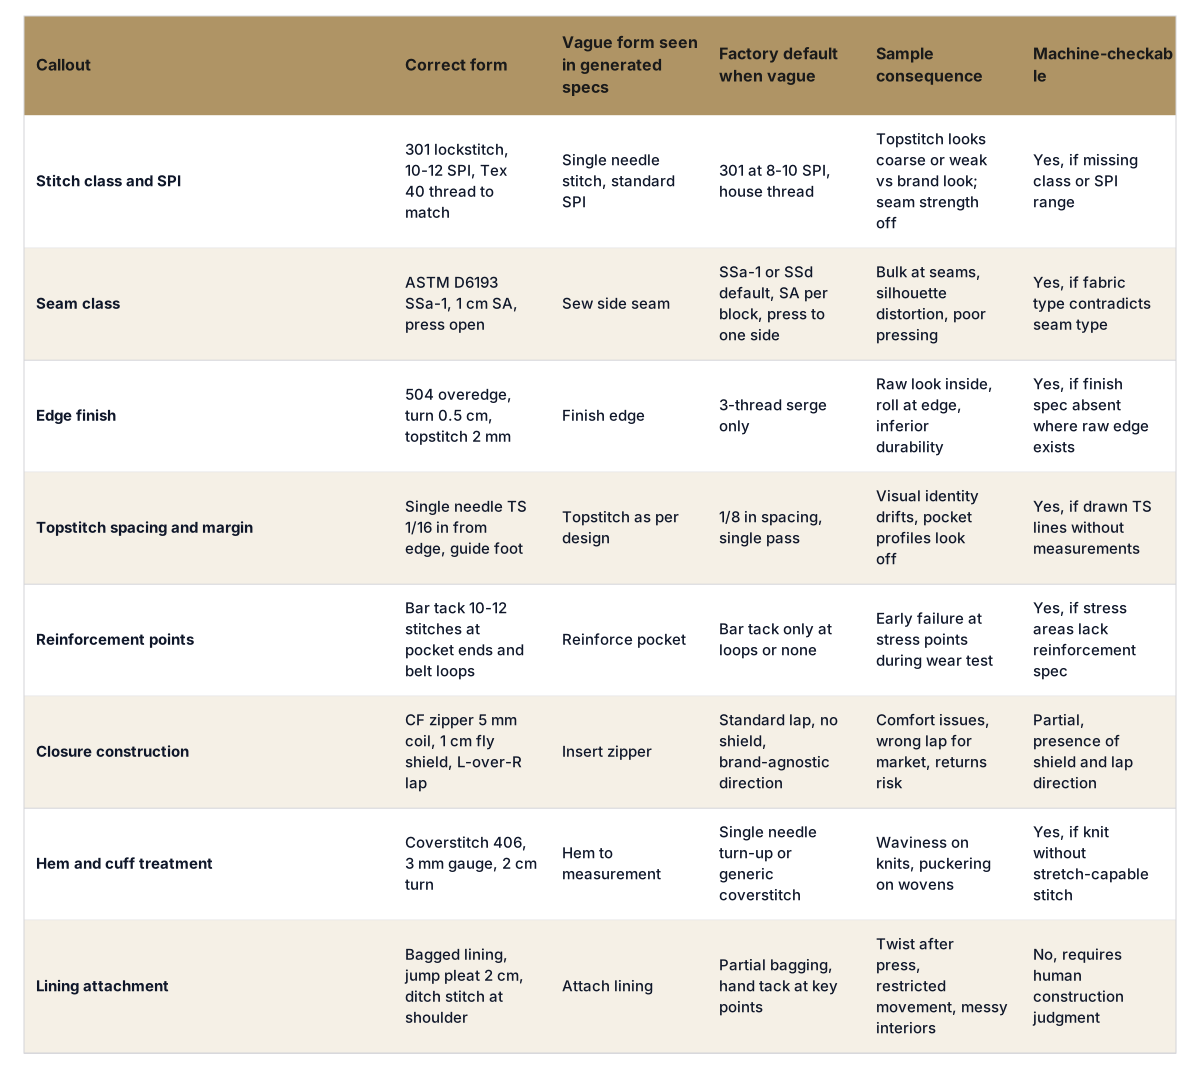
Factories expect three parts in every construction callout: the class, the measurement, and the conditional. Class is the vocabulary a sewing floor understands, for example stitch 301 vs 401, seam SSa vs LS, finish 504 vs bias bind. Measurement is the SPI, SA, turn, or distance that can be set on a machine or guide. Conditional covers things like press open vs to one side, lap direction, or use binder attachment A if GSM exceeds X.
Why AI struggles is not a mystery. Callout selection is contingent on fabric hand, yarn size, and surface finish. It is contingent on the machines and attachments on a vendor's floor. It is contingent on your brand's quality standard and look. None of those are evident in a flat render. A smart system must represent fabric and vendor constraints and your standards before it can propose a sentence that a sewer can trust.
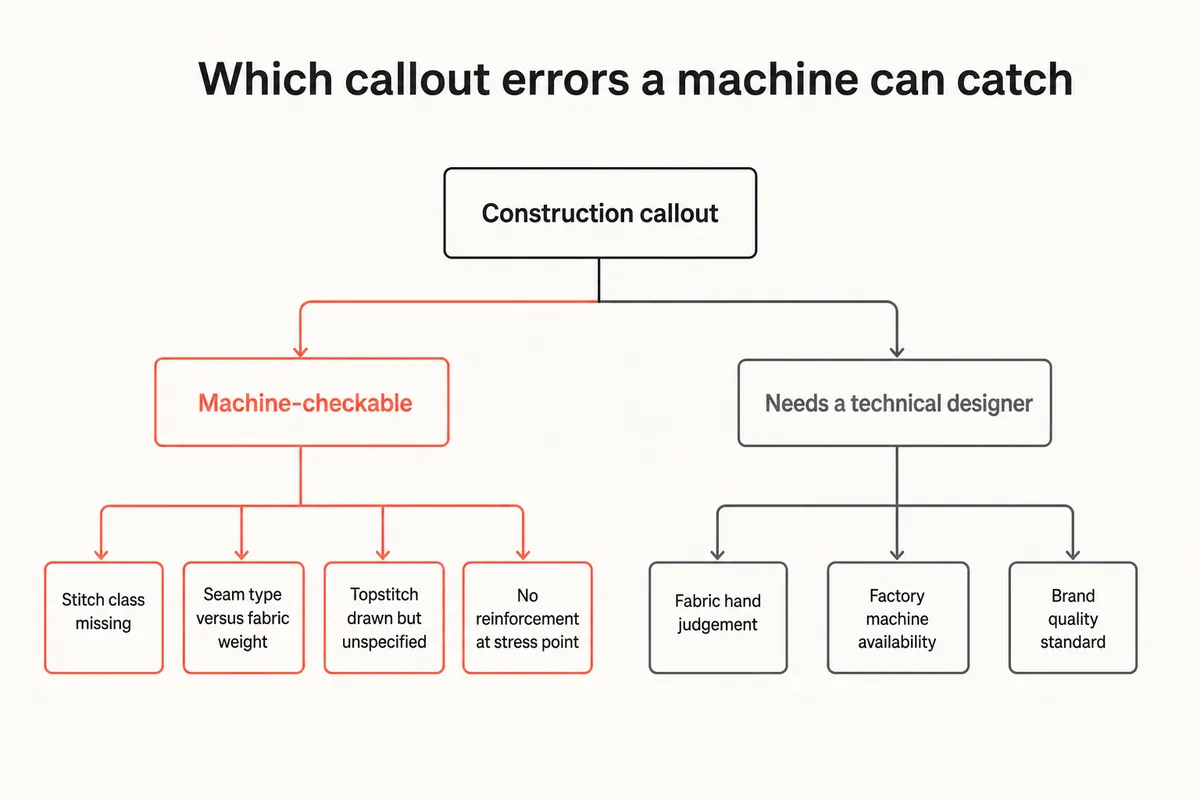
This is the distinction to look for when you evaluate tools. The F* Word generates a factory-ready tech pack in 8 to 10 minutes that includes BOM, graded POM, and construction notes, and it generates moodboards upstream using the same garment intent. But the differentiator is not just generation speed. The differentiator is validation: checks for missing stitch classes, inconsistent seam types for the fabric, unmeasured topstitch lines, or missing reinforcement at stress points. Read how the checks are structured in 7 AI Validation Checks Before Factory Handoff and how the BOM and POM join the same workflow in BOM, POM, Grading with AI.
If you buy workflow, you are measured on cycle time and hit rate at first proto. If you design in house, you are measured on silhouette, stitch face, and consistency to brand. If you merchandise, you are measured on margin dollars and launch date. The path across all three is to set policy by callout, not by tool.
If your current stack is geometry-first or record-first, insert validation in the gap. Intelligent Tech Packs explains how geometry and records stay intact while construction callouts are checked and corrected before anyone sends a PDF. Pre-production Workflow covers the orchestration layer that assigns checks and approvers across teams.
Make the sentence concrete. Here is the workable pattern by area.
When any of these are vague, a factory substitutes a house default. You then pay for a correction round. The fastest time-to-yes is to make the sentence precise, validated, and vendor-aware the first time. The F* Word is designed to do that right before export, not months later after a failed sample.
You do not need a ground-up rebuild to fix construction callouts. Pilot on one style family and one vendor. Feed a stitch and seam library, vendor capabilities, and your acceptable tolerances. Turn on machine checks for the four error types that are objectively detectable: missing stitch class or SPI, seam type wrong for fabric, unmeasured topstitching, and missing reinforcement at stress points. Keep human review where judgment is the real value.
In practice, teams load reference standards once, then the AI drafts and validates on every new style. A technical designer reviews exceptions, not every sentence. A sourcing lead sees vendor-aware specs that do not trigger avoidable comments. A merchandiser sees fewer slips to calendar and a cleaner margin path. If you want a structured way to try it without risk, use the AI workflow pilot plan and the reference on what a factory-ready tech pack includes. Remember the positioning: this is not a PLM and not a 3D sim. It is the validation and orchestration layer that also generates moodboards upstream and a full tech pack in 8 to 10 minutes downstream.
Review protocol for a technical designer on an AI-drafted spec
Start free at thefword.ai and run one garment through validation before it reaches a factory.
They have to keep the line moving, and house methods are trained, repeatable, and costed. If a spec says finish edge without a method or measurement, the efficient choice is a standard 3-thread overedge or single-needle turn-up. It is not a refusal to follow brand intent. It is a pragmatic response to missing instructions.
AI can filter choices using declared fabric type, GSM ranges, and known vendor capability. It can also validate for obvious mismatches like a non-stretch seam on a knit. But when hand feel or visual face is the deciding factor, a human technical designer still sets the call. The accuracy improves once brand standards and vendor profiles are part of the model.
Validation belongs after design intent is clear and before anything leaves your building. Keep 3D for geometry and fit visualization and PLM for record-keeping and approvals. Insert validation to check construction callouts and other production-critical fields as the bridge. The F* Word exists as that bridge and does not replace PLM or 3D.
From a garment design, The F* Word produces a factory-ready tech pack in 8 to 10 minutes, including BOM, graded POM, and construction notes. The faster outcome is not just generation speed but fewer vendor comments because validation runs pre-export. Teams usually see fewer revision loops on the first pilot capsule.
Get The F* Word workflow insights in your inbox.